Showing posts with label Funky Fairy. Show all posts

Friday, April 13, 2012

Fairy Wishes

Having got the birthday cards for May done and still trying to decide exactly what I want to the for the May wedding card, I made a start on the June birthdays. You might wonder why I am trying to get so far ahead of myself - let me explain. I am heading to bonnie Scotland at the beginning of May and won't be returning to my main craft room until at least the middle of August. Although I do make cards in Scotland I don't have all my bits and pieces there and thus find it a bit more difficult to be creative.

Onto the first of the June birthday cards for the youngest of my great-niece's, Orla


Card Recipe
Cardstock
Card Base - C6 white card from Craft UK Limited
BoBunny Back to Backs - Petal Pushers Doodles

Embellishments
Topper - Funky Fairy - Image 16
Sentiment - Pink Gem Designs - Fairy Wishes
Buttons - my stash
Ribbons - my stash

Equipment Used
Cuttlebug
Nestabilities - Standard Circles
EK Success Border Punch (sorry don't have the name)
Versacolor Ink Pad - Raspberry
Promarkers

Challenges
Cropstop - Challenge 67- Bows and Buttons
Digi Doodle - Paper Lace

Thanks for popping by.
Monday, July 12, 2010

All done.

As I am heading home to Bonnie Scotland at the end of the week and won't have any of my crafting gear at home with me I have been trying to get all the cards I need till the end of September done. Got the final one finished today so I can now relax a bit.

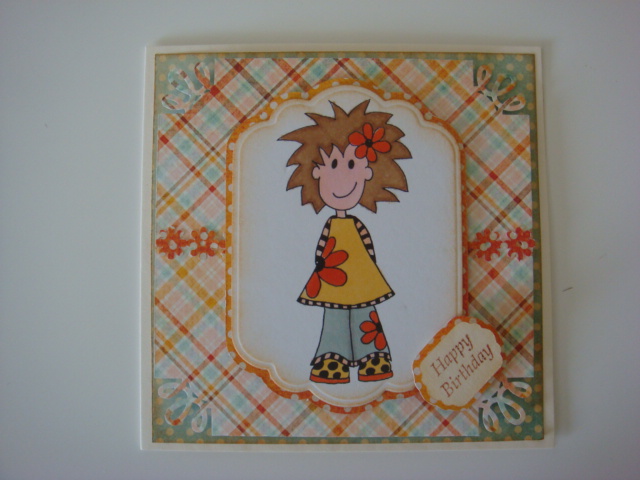
The card to finish off September is for my eldest daughter, Tara. The inspiration for this came from the cardstock - BoBunny's Back to Backs Kitchen Spice Nutmeg and Kitchen Spice Sesame. My image is from Funky Funky and which is coloured in with copic pens. I used Martha Stewart's Loop Corner punch and EK Success' Daisy Chain to add a bit of embellishment. For the sentiment I used the 'Happy Birthday' stamp from Kanban's Garden Vistas - Spring Silhoutettes. For the image and sentiment mats I used Labels Four nestabilities. The edges were distressed with Adironkack Cabin Fever.

This next card is also for Tara as she is changing jobs at the end of the month. The cardstock came from K&Companys Citronella collection. The image which I coloured with copic pens is a stamp from Whispers but doesn't have a name only a bar code, lol. I used the nested eggs to make the various mats and a two marvy punches to make the tags and which are held together with a brad and a peel off sentiment.

The final card was a request for a grand-daughter who is into pink and girly things. I used Smirk's Naughty But Nice for the elements of this card using various of the sheets to make the mats. For the images I trimmed three images from one of the image sheets and attached them using foam pads. For a bit of bling I added two glittery brads and finished off with a peel off sentiment.


Thanks for popping by.

Saturday, July 3, 2010

Happy Birthday

Today's effort was done to put into Card Patterns Challenge, but I was just too late to get it posted, but at least the card won't be wasted as I did it for my sister-in-law, Judith's birthday.

The cupcake image, which I coloured in with copic, and backing papers came from Funky Fairy (sadly who have stopped trading). The backing papers were from Ecclectic Lurve Part 3 - Distress 1 and Cupcake Crazy Scribbles. The ribbon, flowers and brads from my stash. The 'Happy Birthday' sentiment was stamped using a combination of Versacolor Petal Pink and Raspberry.

For the base mat I used Fiskars Threading Water punch to punch around a corner with a fiskars punch - a new technique for me and one which I can see being used regularly.

Although I missed the Card Patterns Challenge, I can still enter it into a couple of challenges. The first challenge is Bee Crafty's 3D Challenge and the second is La-La Land Crafts New Technique Challenge as the punching round the corner was a technique that I have never tried before.

Thanks for popping by.


Saturday, January 9, 2010

First of January's Birthdays

This morning woken early, and I mean early - 4am - and couldn't get back to sleep. So got up and with a cup of tea in hand headed for the craft table. Made a start on the card for the next January birthday, our good friend Dan over in Saudi.

The papers I used were a recent purchase from Funky Fairy before she closed the shop, from the range - More For The Men. The image was a freebie from Cuddly Buddly that a crafting buddy forwarded on to me.

For the image I brought out my copic pens and added a wee bit of colour. Then cut out the circle using one of the nestabilities circles. To make the topper I used two different circles, one a plain circle the next size up from the one I used for the image, and the second one was the inverted scalloped circle.

For the mats I used two of the sheets which I had printed off from Funky Fairy. The ribbon effect strip across the card was made from another two sheets from Funky Fairy.

Later on in the morning met up with my Bahrain crafting buddy, Linda and Norma, Linda's crafting buddy from the UK who is out on holiday, at our favourite crafting and coffee shop. After tea and cake we had a wee bit of retail therapy.

Thanks for popping by.

Friday, August 14, 2009

First Ever Challenge Win

Having a great few days in Dubai and still trying to get caught with emails and blogs, couldn't believe my eyes when I read on Funky Fairy's blog that I was the winner of the Black and White Challenge. Needless to say I am just chuffed to bits and can't wait to play with my prize.

Thanks for popping by and I'm off to collect my reward.

Friday, August 7, 2009

Funky Fairy - Black & White

I think I must be going through a black, white and cream phase just now, lol.

Over at Funky Fairy this week, the theme is black and white. For the card base itself, I thought I would try a new technique - A Side Step Card - having seen a few cards in Val Craftroom's. The next stage was to have a look through what Funky Fairy papers and digital images I had to see if any fitted the bill. As soon as I saw the star backing paper everything seemed to fall into place. I resized Funky Fairy 8 then printed her off, then trimmed off the excess card at the right hand side then mounted it onto the left hand side of the card base. For some embellishing added some brad from my stash.

Oops nearly forgot, here are the instructions on how to made the Side Step Card, thanks to Jackie over at Addicted to Stamping.

Thanks for popping by.

Saturday, July 25, 2009

Cupcake Birthday

Spent the morning buried in my wee crafting corner, working on a card for a couple of challenges. The first challenge is over at Funky Fairy and had to be something girly. Well what could be more girly than pink. The layout came from the second challenge, Sketch and Stash.

One of the rules of the challenge over at Funky Fairy is that you must use a Funky Fairy download. I decided that I would use everything from there, well apart from the brads. The papers and images come from the Cupcake Crazy and Just a Bit ranges. Resized the images and papers to get the components for the layout. For the cupcake decoupage, I cropped and resized one of the cupcake frames to a suitable size and then made three copies. The bottom layer being all three cupcakes, the second layer two cupcakes and the top layer a single cupcake. Apart from the very pale pink mat, all the components were mounted using foam pads.

With all the challenges I enter I try to make a card for someone on my birthday list and this one is no different. This one will soon be winging its way to my great-niece, Abbie.

Thanks for popping by.

Monday, July 20, 2009

Thanks So Much and a Challenge

After having an excellent weekend with our friends in Ruwais over in Abu Dhabi, thought I would sent them a wee card to say thank you.

This week's challenge over at Funky Fairy, and which I have also entered, provided the inspiration. All the papers and images came from one of Funky Fairy's kits - Just a Bit. For the toppers, I reduced them down in size and included the sentiment before printing them off. Decoupaged the two leaves and the pink flower with foam pads. Used my latest purchase to do get the photo corners done, can see it becoming one that will be well used.

Thanks for popping by.