Showing posts with label cuttlebug. Show all posts

Wednesday, March 13, 2013

Today's card is one for one of my fellow Canasta galpals.  Unfortunately due to a prior committment I can't attend the celebrations, so the least I could do was a card.
 
Have seen a few cards recently using paper piecing, so thought I would give it a try.

 
Card Recipe
 
Card Stock
C6 White Card Blank from Craft UK Limited
My Mind's Eye - Nostalgia Designer Paper Pad
 
Embellishments
Digistamp - Digistamp Boutique - Dress & Mannequin
Sentiment - Anita's - Happy Birthday
Flowers, Brads, Ribbon - my stash
 
Equipment Used
Nestabilities - Mega Ovals Large
Cuttlebug
EK Success Border Punch - Diamond Scallop
 
Challenges
Pink Gem - Gem of a Challenge

Thanks for popping by.

Sunday, May 6, 2012

To Have and To Hold

Had a lovely morning with Linda J (aka Pinklilacs), went for tea and cake at our favourite craft shop on the island.  After we were fed and watered had a wee bit of a shop.  I have to say thanks to Linda for her help picking the papers to allow me to finish the scrapbook album project I have been working on.  Fingers crossed by the time I head home to Scotland on Saturday all that will be left to do is the journalling.

When I came home got a wedding card finish for the wedding that Billy and I are going to at the end of the month. 


Card Recipe

Cardstock
Card base - from my stash (I think possibly from a Create & Craft kit)
White lustre cardstock.

Embellishments
Topper - Digistamp Boutique - Cute Bride and Groom
Sentiment - Rennie Mackintosh Allan Greig font
Ribbon - my stash

Equipment Used
Cuttlebug
Nestabilities -  Labels Eight
Mica Masks - 6x6 Decorative Masks
Whispers Archival - Straw Mat
EK Success corner rounder punch.

Challenges
Digistamp Boutique - May Customer Competition

Thanks for popping by.

Friday, April 13, 2012

Fairy Wishes

Having got the birthday cards for May done and still trying to decide exactly what I want to the for the May wedding card, I made a start on the June birthdays. You might wonder why I am trying to get so far ahead of myself - let me explain. I am heading to bonnie Scotland at the beginning of May and won't be returning to my main craft room until at least the middle of August. Although I do make cards in Scotland I don't have all my bits and pieces there and thus find it a bit more difficult to be creative.

Onto the first of the June birthday cards for the youngest of my great-niece's, Orla


Card Recipe
Cardstock
Card Base - C6 white card from Craft UK Limited
BoBunny Back to Backs - Petal Pushers Doodles

Embellishments
Topper - Funky Fairy - Image 16
Sentiment - Pink Gem Designs - Fairy Wishes
Buttons - my stash
Ribbons - my stash

Equipment Used
Cuttlebug
Nestabilities - Standard Circles
EK Success Border Punch (sorry don't have the name)
Versacolor Ink Pad - Raspberry
Promarkers

Challenges
Cropstop - Challenge 67- Bows and Buttons
Digi Doodle - Paper Lace

Thanks for popping by.

Wednesday, April 11, 2012

Snuggle Birthday

Now that I have got all the cards for April's celebrations are done, decided to make a start on May's cards. Only cards for 2 birthdays and a wedding to do. The first of May's celebrations is a birthday and a male one at that.

Card Recipe

Cardstock
Base Card - 5 x 5 white card from Craft UK Limited
BoBunny Back to Backs - Abbey Road Dot
BoBunny Back to Backs - Abbey Road Strip

Embellishments
Topper - Digistamp Boutique - Snuggles Frog
Sentiment - on my computer using Pink Gem Dotty Font
Gems - my stash

Equipment Used
Cuttlebug
Nestabilities - Classic Cirles and Blossom
Tim Holtz Distress Ink - Peeled Paint
Brazill Jewel Templates - Glitz
Promarkers

Challenges
Catch The Bug Challege Blog - Stella Says 'Sketch' Challenge 108
Digistamp Boutique - April Customer Competition

Thanks for popping by.

Sunday, April 8, 2012

Happy Anniversary

Started off today with the 2nd of training walks (5 miles) for the Moonlight Prowl in Fraserburgh on the 2nd June. Once I got a few jobs done about the house, settled down to make some cards that I need to get posted this week.

The first (hopefully will get a couple more made) of today's cards is an anniversary card inspired by a sketch that I picked up last week, but can't remember where.

Card Recipe

Cardstock
Base Card - 5 x 5 white card from Craft UK Limited
Kanban Quad Metallic Embossed Cardstock - Cerise
Moondust Paper

Embellishments
Pearls - my stash
Gems - my stash
Happy Anniversary peel-off

Equipment Used
Cuttlebug
Nestabilities - Classic Squares & Classic Scalloped Squares
Cuttlebug die - Butterflies (combo)
Cuttlebug embossing folder - Butterflies (combo)

Thanks for popping by.

Tuesday, April 3, 2012

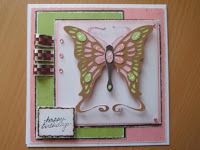
This card has been on that I have been working on for the last few days. For some reason I just couldn't settle down to do, but time is marching on and I need to get it posted for a friend's birthday. My inspiration for it came from the project in the Cricut 'Art Nouveau' Booklet.

Card Recipe

Cardstock
Base Card - 5 x 5 white card from Craft UK Limited
Cardstock scraps from my stash

Embellishments
Ribbon - Create & Craft pack
Stickles - Star Dust
Gems - my stash

Equipment Used
Cuttlebug
Nestabilities - Deckled Rectangles
Cricut Cartridge - Art Nouveau - Butterfly
Stamp - Whispers
Ink - Stazon - Timber Brown (sentiment)
Ink - Tim Holtz Distress Ink - Spun Sugar (edge of white mats)
Paper Scuffer

Thanks for popping by.

Sunday, March 25, 2012

Embossing Nestabilities Die Cut

I have to thank Izzy over at Cricut Community Forum for pointing me in the right direction on how to use my Cuttlebug, along with Nestabilities dies and embossing folders (any brand) so that the centre of the die cut was embossed whilst leaving the border edge smooth. I posed the question a couple of weeks ago, after I cut out a shape with a nestabilities die and running the die and die cut through my cuttlebug to form a border edge and then putting the die cut only into an embossing folder and popping it into the cuttlebug. My border edge was also ended up being embossed. Just like the picture below, not very pretty.

I realised that to keep the border edge smooth I would have to include the die in any sandwich that I used so that only the centre would be embossed, but further realised that the die would more than likely end up damaging the embossing folder. Izzy replied that the only way might be not to close the embossing folder. Well today I had a try and success exactly what I wanted.

Enough of waffling on. This is how I did it.

First of all cut my shape out as normal using the sandwich of 'A' plate, 'B' plate, cardstock, die and topping it all off with the 'C' plate.

After carefully removing the die and die cut I made up another sandwich, which comprised of the 'A' plate, shim of cardstock, embossing folder (fully opened), die with die cut (with the die cutting edge facing upwards towards me), tan embossing mat and again topped off with the 'C' plate.

And the final result, just what I wanted.
Hope you all find this useful and thanks for popping by.

Just A Note

House is so quiet, my son's holidays are over and he is now back home. Roll on May when I get home and will see him and the rest of the family again. This morning had to change my plans as my hair appointment was changed till the afternoon. After getting caught up on paperwork got a card made - just to say sending hugs.

Had a wee play at embossing a nestiabilities die cut so that only that the centre of the die was embossed and the edge remains unembossed. Will posted later on how I did it.

Card Recipe

Cardstock
Base card - C6 white card from Craft UK Limited
Mats - freebie paper (no name on it)
White lustre cardstock

Embellishments
Topper - digistamp - Olive (from Digistamp Boutique)
Sequins - my stash
Gemstones - my stash
Crochet Ribbon - my stash

Equipment Used
Cuttlebug
Nestabilities - Deckled Rectangles
Embossing Folder - Cuttlebug Bloom Dots
Stamp - Funstamps - Just A Note
Ink - Whispers Archival - Green Leaf

Challenges
Digistamp Boutique - March Competition

Thanks for popping by.

Saturday, March 24, 2012

It's a boy

Managed to get this card one in between eating in two of my favourite places on the island. Son and his chum's visit is almost over, so needed to get this card done so that son could post it when he lands back in Scotland.

Card Recipe

Cardstock
Base card - C6 white card from Craft UK Limited
Mats - Bobunny Double Dot - Powder Blue Stripe & Blueberry Stripe

Embellishments
Ribbon - my stash
Gems - my stash
Sentiment - printed on computer

Equipment Used
Cuttlebug
Nestabilities - Classic Square & Scalloped Square
Cricut for 'B', 'O', 'Y'.
Stamp - from Whispers
Ink - Tim Holtz Distress Ink - Faded Jeans & Tumbled Glass

Thanks for popping by.

Tuesday, March 20, 2012

Pretty Sad

Playing cards today instead of playing tour guide. A sad card to make today, for a family friend who passed away at the weekend back home.

Card Recipe

Cardstock
Moondust papers
White Lustre bulk card

Embellishments
Pearls - my stash

Equipment Used
Cuttlebug
Nestabilities - Standard Circles & Beaded Circles
Embossing Folder - Cuttlebug - Friends Forever
Stamp - With Sympathy
Chalk

Challenges
Saturday Challenge - Doilies are not just for cakes

Thanks for popping by.

Wednesday, March 14, 2012

Ladybird Birthday

Hoping to get another card done today, but if not then this might be my last card for a week or so. My son is arriving tonight for a wee holiday. So looking forward to seeing him and spending some time with him.

Card Recipe

Cardstock
Freebie Papers designed by Jak Heath called A Little Bit Bugged
Red - BoBunny's Back to Backs Wild Berry Red Dot
Green - K&Company Recycled

Embellishments
Ladybugs - Jolee's Boutique
Ribbon - my stash
sentiment - freebie stamp from Papercraft Essentials
(Issue 58 - Henry the Hedgehog set)

Equipment Used
Cuttlebug
Nestabilities - Labels 11

Challenges
The Craft Place - Anything Goes

Thanks for popping by.

Tuesday, March 13, 2012

Art Nouveau Tulips

Managed to get a second card done yesterday, this one an anniversary card for good friends back in the UK. Thought that after using card kits for a couple of days, I would make something from scratch.

For this card I used both my Cricut Expression and Cuttlebug. Cricut to cut out the floral image using the Art Nouveau cartridge and the Cuttlebug along with plain circle nestabilities to cut out the circle mats. Also edged up the green and pink edges with Brushed Corduroy Distress Ink. Finishing off with a bit of ribbon and peel-offs from my stash.

The layout was courtesy of Card Patterns Weekly Sketch Blog.

Thanks for popping by.

Saturday, October 16, 2010

My First Christmas Card

Yes, you've read the title right, I have mentioned the dreaded 'christmas' word.
Got the impetus to start when I received an email from Quick Cards letting me know what is in this month's issue. Top of the email was the 'Quick Cards Bonus Papers Challenge'. The challenge was to make a christmas card using the free downloadable bonus papers. I do love freebies, lol!

To make the card I printed off the bonus papers, took out my trusty 'Bug' and die cut some christmas trees from glitter foam, printed off a sentiment and added some gems and Voila!.

Thanks for popping by.

Wednesday, July 7, 2010

Christmas in July

Summer's not hardly begun and some of us are thinking about Christmas already. How many of you are saying, 'AAAAAAGGGGGHHHHH, you've mentioned the dreaded word'. Well they are over at Stampin' For The Weekend - for theie current challenge you are provided with sketch and a theme - Christmas In July - to follow.

I don't really start thinking about christmas until after the summer but thought I would give it a go and see what I could come up. My stamped image is one that I have used a fair bit for christmas cards and fairly easy to colour in. I coloured the scarves, holly leaves and hat band with copic pens. For the mats I took out my nestabilities - rectangles and big scalloped rectangles. For the circles I used a couple of circle cuttlebug dies. The cardstock is a two-sided cardstock from Basic Grey called Eskimo Kisses Thin Ice. For the sentiment I used a peel-off.

Thanks for popping by.

Saturday, June 26, 2010

This Bud Is For You!

Today's card was done for one of the teachers at school who wanted a card to send to friends to say she was thinking of them.

The image which I coloured in with copic pens and the sentiment came from the freebie section over at Whimsie Doodles. For the base mat and scalloped circle I used BoBunny's Ella Enchated cardstock and the top mat, more BoBunny cardstock, this time Abbey Road Stripe. The ribbon is from the Triple Check Dobby Satin Ribbon Collection.


I have included it in Whoopsi Daisy's June Challenge - Ribbons and Bows.

Thanks for popping by.

Thank You

With the end of the school year, Lynn who runs the school thought it would be a nice touch to say thank you to all the girls for making the first year of Sunflower House a success. What could I do that was a bit special but not complicated as I had 18 cards to do. So having had a scramble through my crafting shelves decided to rely on my trusty 'bug' and do some die cutting and embossing.

Using cream lustre cardstock made a DL card, made a mat the whole width of the card from gold lustre cardstock. Using offcuts of the cream lustre die cut three squares with the plain square nestabilities, embossing one, stamping thank you onto another with Mocha Truffle from Versacolor and leaving the third plain. Die cut two butterflies, one in cream and one in gold and embossed them, curling the wings, the cream in the opposite direction from the gold and attaching them together with foam pads and mounting them onto the plain cream square again with foam pads.

Thanks for popping by.


Monday, June 7, 2010

Happy Anniversary

Don't you get flashes of inspiration in the funniest of places!!! The flash of inspiration for this card came yesterday morning as I walking to the car when I popped out of the office to drop off an order at the photo shop.

Started off with my trusty 'Bug' and my plain square and big scalloped square nestabilities. Using the largest die of the big scalloped square nestabilities cut and embossed the frame out of Imaginisce's Kewl Stuff - Wassup?. To create the frame used the third largest plain square nestability. Then with Cuttlebug's nested heart die cut out two sets of hearts, one in Kewl Stuff - Wassup and another in fushia/pink mirri card.

Using two different thicknesses of foam pads stuck down the frame and smallest heart onto a white base card. The largest heart was stuck directly onto the card. Finishing off with a sentiment that I printed off and matted onto the same cardstock as the frame.

Thanks for popping by.

Sunday, April 18, 2010

Ma'assalma MK2

Another Ma'assalama card for a friend of mine who is leaving Bahrain and retiring to Scotland. I used the same cardstock and ink pad as the previous Ma'assalama card but used a different embossing folder and stamp. The embossing folder is a new one for me, a recent purchase. I can see it being one that will be used a lot.

Thanks for popping by.

Thursday, April 15, 2010

Ma'salama MK1

The Vice-President of the Callies asked me to do a card for a couple who are leaving Bahrain and who have attended her Scottish Country dancing classes for many years. She asked if it could reflect Scotland and Dancing. After a fruitless search online for Scottish Country Dancing images, I looked in my stamp and embossing folder boxes and found the musical notes embossing folder and a stamp with part of 'Auld Lang Syne'. In my 12 x 12 paper box I found some two side card - Imaginisce - Go For Baroque - Ooooh La La.

I inked up the Auld Lang Syne stamp with Adirondack's Cabin Fever ink pad and stamped on to a light gold lustre cardstock. The same cardstock was embossed and then I took a brayer inked up with the Cabin Fever stamped and rolled it over the embossing. Both these pieces of cardstock were matted on the red side of the Imaginisce cardstock. The yellow side was matted on to an A5 sized card in red lustre.

The sentiment - Ma'assalama (arabic for goodbye) was printed out and matted onto the red Imaginisce cardstock.

Thanks for popping by.

The Same But Different

When one of the girls that work in the school with me asked if I would do a card for her nephew's engagement, I knew right away what I would do. Especially just now that is amazing for me as I can't seem to get my brain into cardmaking mode. Anyway it was using a layout that I did recently for an anniversary with the original inspiration coming from a magazine called 'wedding invites'.

Using the cd that came along with the magazine I print off one of the designs onto white lustre cardstock, as I call it, and cut out 3 square using the square nestabilities and the smallest heart from cuttlebug's nested hearts. Another 3 squares were cut from plain white lustre cardstock and embossed and a third set of 3 squares were cut from pale lilac lustre cardstock along with the word 'love'.

All the squares were matted onto a square of matte lilac cardstock which was matted on a base card of white lustre cardstock. Foam pads were used to stick the heart onto the bottom left hand square. The word 'love' was stuck onto the centre and bottom right squares.

Thanks for popping by.